Zappi Installation
Replacing a dumb EV charger with a smart one.
Back in 2015 I bought a
BMW i3 REX, and at the time had a 7kW charger charging socket fitted from
ChargeMaster (now part of BP). It worked fine, and since the 2015 i3 has a small battery (~20kWh) full charges took just a few short hours. Wonderfully boring and predictable.
Fast forward to present day and the ChargeMaster socket repeatedly overheats and cuts out leaving me with potentially not enough charge for the day (ok, so there’s the range extender but that defeats the point). After a few calls to genuinely lovely people at BP ChargeMaster, we’re not getting anywhere fast. The warranty has expired and I never did talk to anyone - nice as they were - that I’d trust to wire a plug. But if I hand over another £500 I can get a replacement at some point.
£500 for a socket - even a special, high-current, safety-concious socket is a lot of cash. So let’s look around first.
My first port of call was the Rolec sockets. Since this is a straight swap of like for like, it looked like a winner. It’s a few quid cheaper than the ChargeMaster kit too. Only problem is that electrical regulations have tightened up since my original socket was installed. The 18th edition regs require additional earthing to protect from the terrifying possibility of PEN faults on TN-C-S supplies. Installing an earth rod is a big undertaking, so what to do?
Earth rods are not strictly required for indoor use (on the basis that you’re unlikely to sever the earth), but I’m conservative around mains electricity.
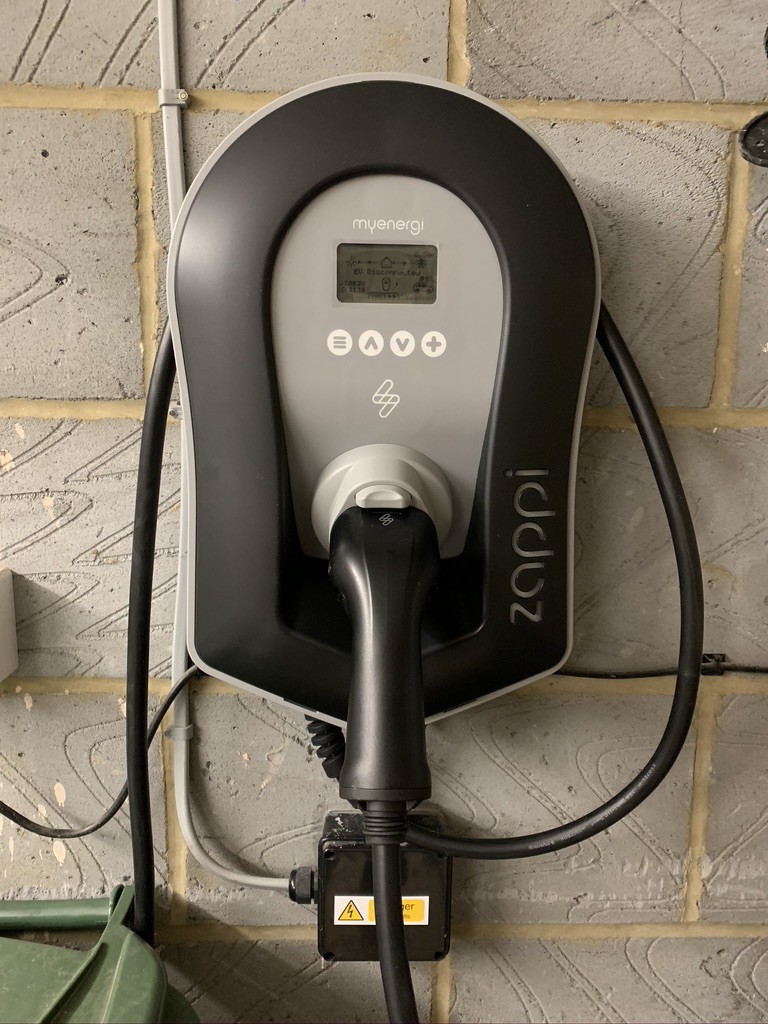
As it happens there is a more expensive but far better value EV charging socket available - the MyEnergi Zappi - which does not require an earth rod and has clever circuitry to detect PEN faults. It’s a couple of hundred quid more at ~£700 plus another few quid for associated smart gadgets. But this is easily made up for by the simple install and being 18th edition compliant without the cost and (surprising) complexity of correctly installing an earth rod.
Having received the Zappi, Harvi and Hub the installation was easy enough. In the Consumer Unit (“fuse box”), the existing 32A Type C MCB had to be replaced with a 32A B-curve MCB. This circuit on my CU happens to be RCD protected, but that’s not critical since the Zappi has RCD protection on the AC and DC circuits (18th edition regs again). My wiring was already present and suitable from the previous installation, 40A rated, wall-pinned and visually in excellent condition. It only needed 30-40cm of 10mm twin and earth from the existing junction box through the conduit and into the Zappi.
I recently bought a ferrule set and crimper after seeing one in use on a video by Artisan Electrics which really made the 10mm cable connections feel very robust. I would recommend this since they’re cheap to buy and easy to use.
So far so good - the electrical work is very easy and because the charger has clever electronics, it’s just like wiring a regular domestic socket.
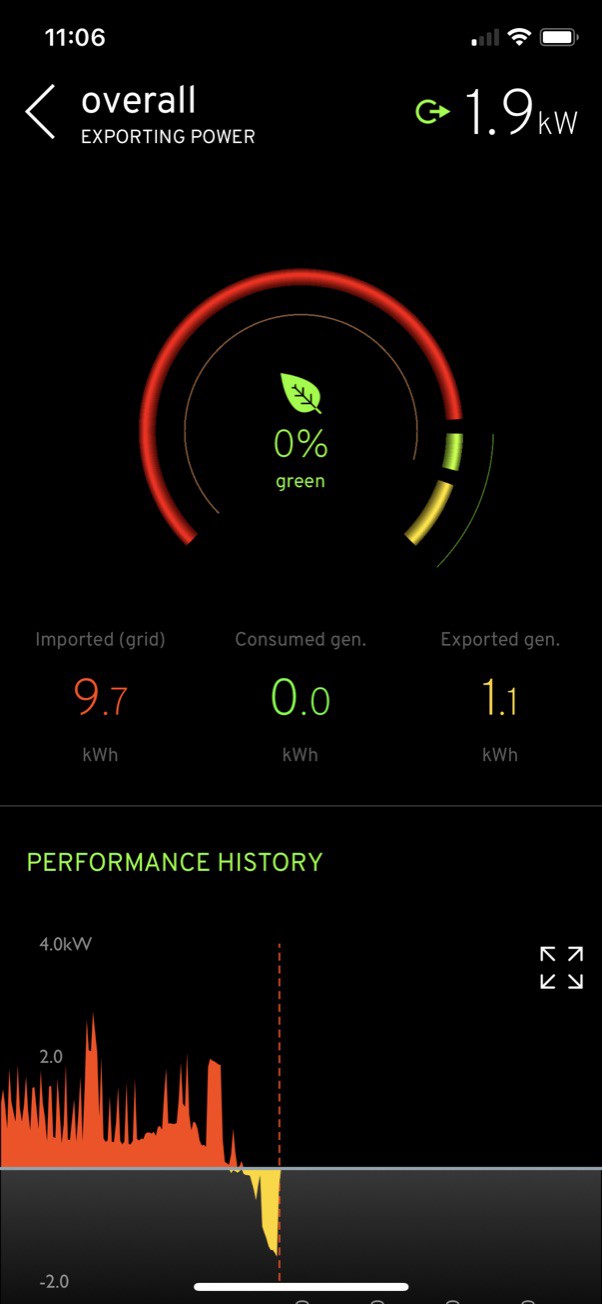
One of the nice things about the Zappi is that it’s “smart.” It can try to use on-site generation to charge your EV when there’s excess power. And even if there’s a heavy load on your main supply (I live in the UK, so single-phase supplies are very common for houses), it’ll adjust its power delivery so that the house as a whole never draws more the mains rating (100A for me).
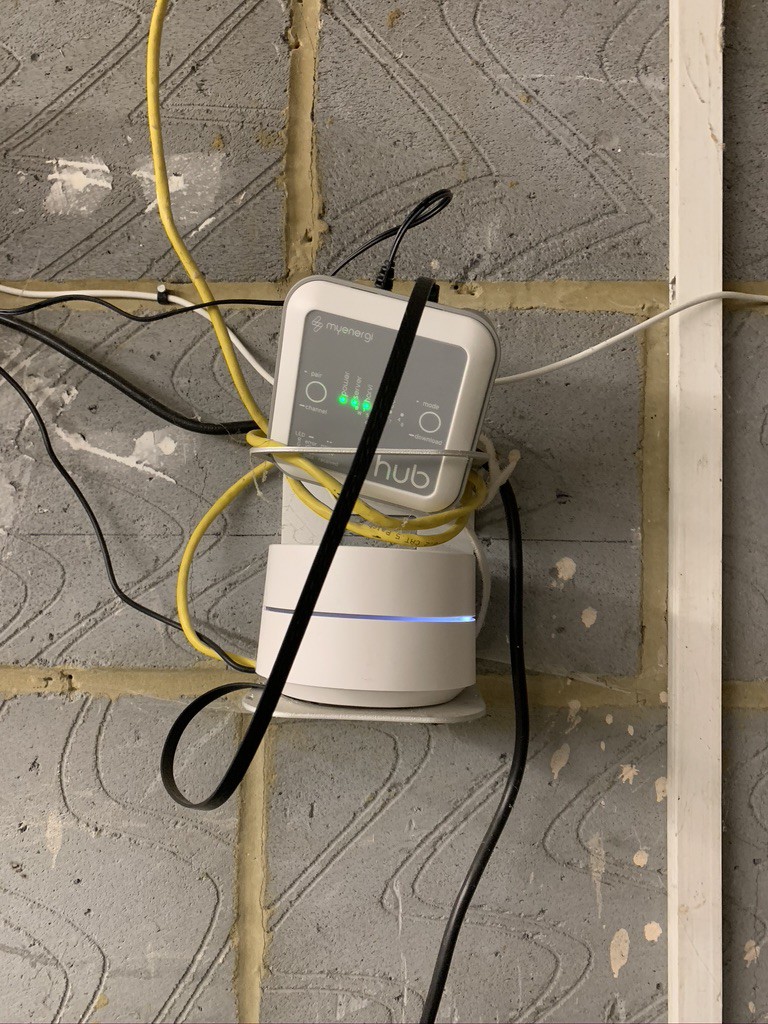
Zappi senses its electrical environment using current transformer (CT) clamps. Remembering A-level physics, the current passing along a conductor can induce a current in a nearby coil proportionally to the current flowing in the main conductor which can be (safely) measured. Zappi comes with a CT clamp and I used the Harvi which provides a wireless bridge from the CT clamp to the Zappi instead of running the cable across the ceiling of my garage.
I hadn’t read the instructions well enough and there were two problems here:
- You have to tell Zappi that its internal
CT1is set toNONE. Then you have to nagivate to the Harvi device and set itsCT1toGRID. Ok, so took me a little while to fathom that, but got there. - The bigger downside is that when using Harvi to wirelessly monitor the grid line, the maximum permissible mains current is 65A, which is 35A less than my mains rating (and indeed could supply a whole other charger). It’s not a problem for now, but adding a second EV and Zappi in the future could lead to slower and less predictable charging rates.
My solution to this will be to hardwire the grid CT clamp to the Zappi by running cable round the garage. I’ll then use a second CT clamp plus the Harvi (bought and paid for, so I have to put it to use) to monitor solar output. Solar monitoring is just a nerd thing so that I can see generation on the app: the Zappi does not use the solar CT clamp in its control algorithm.
All of this comes together in a nice app if you use the Hub, so you can see real-time use and program EV charging without having to be at the Zappi.
I’m very impressed so far. Sure there were a couple of little gotchas while I learned my way around the menus, but otherwise a straightforward experience. Funelling excess solar into the car automatically is super nice, and the unit looks smart and is safe. The setup can also handle a static battery installation (with more CT clamps) and can prioritise whether EV or static battery storage gets excess solar power and it can also minimise using the battery to charge the car (which is very sensible).